When looking for inspiration for a project, Sea World Scrapbook Layouts are filled with an endless supply of design possibilities. Since it is vacation time again, I wanted to share some Sea World inspiration with you.
This post contains affiliate links. Thanks for supporting our site.
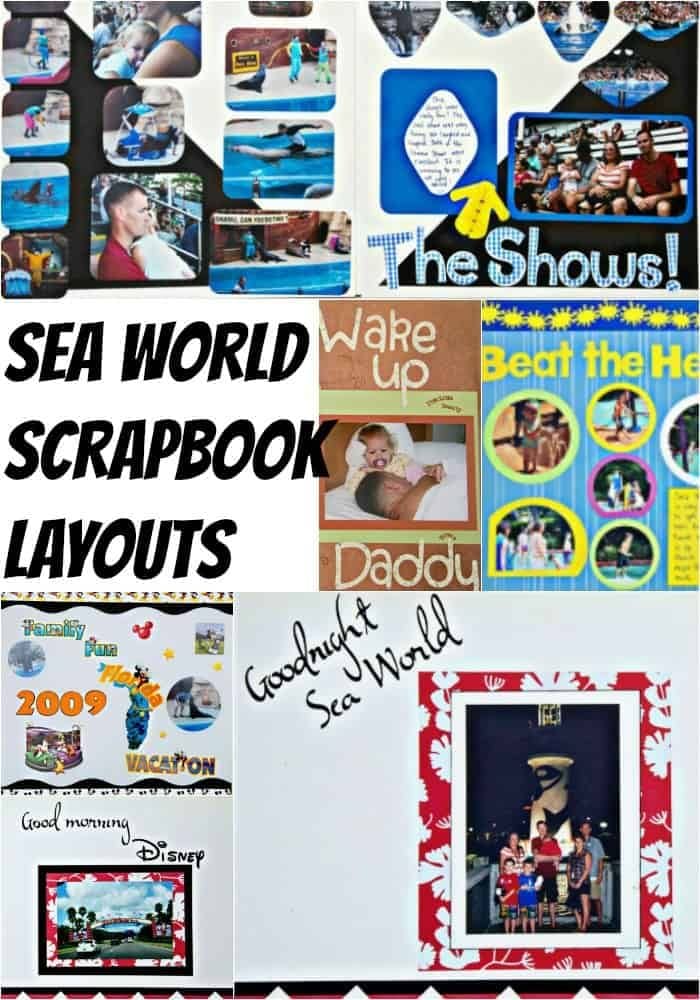
Sea World Scrapbook Layouts:
Sea World Layouts Instructions:
The Cover: Family Fun Florida Vacation Page
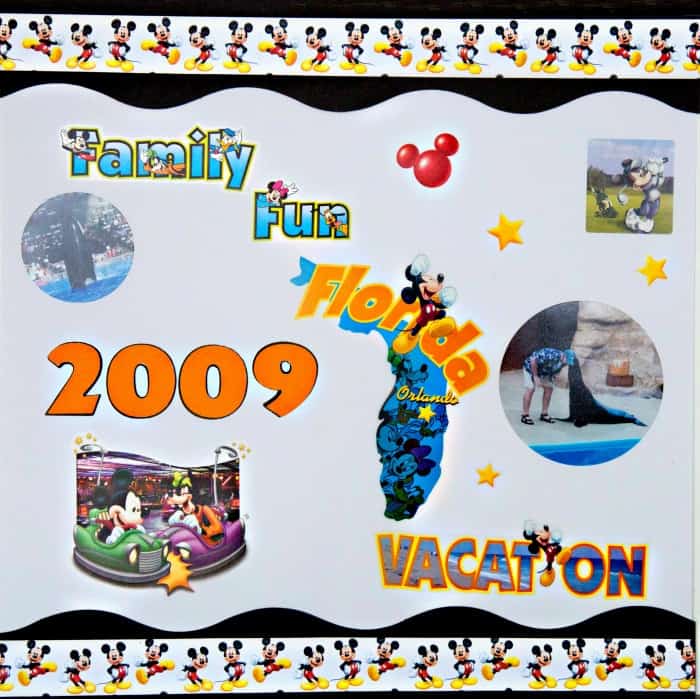
In this case, the trip to Sea World also included some time spent at Disney World. For the cover, both parks are featured. When creating your cover page, you can use one attraction or more if you prefer. To recreate the black borders, use a 12-inch decorative trimmer. Then to bring in the theme, add a strip of printed specialty theme paper that you have cut using a standard 12-inch paper trimmer. Adhere it to the wavy border. Then attach your personally designed border trim to the page. Any font you want to add can be cut out with a Cricut cutting machine, or letter stickers can be purchased and applied. Most craft stores will have specialty stickers for Sea World, and you can pick some nice ones out and add them to your book. Of course, a few pictures can be added, too. There are a couple of options available to recreate the round picture on this page. You can cut out your photograph using a shaped trimmer, or trace your shape using a shape template and then cut out the shape with scissors.
Sea World Scrapbook Colors Pages:

On this page, the decorative trimmer was used again, with a different angle. Cut the border the same, but wider, and cut the other pieces while holding the paper at an angle. For this look, cut the title letters with the Cricut Tear Drop Cartridge. The embellishment at the top was drawn freehand and cut out with scissors in hopes of creating something that looked like a tail, or fin. Each photograph is double matted, and the pictures and the cardstock to create mats can be cut out using the 12-inch trimmer. The lighter part of the matting can be enhanced using a technique called distressing. There are a couple of ways to do this, either running the edge of the card stock you want to be distressed over your ink pad or using a sponge or other applicator and applying the ink to the edges that way. You can add your tickets to this page as well, with or without matting behind them.
The Plan Sea World Scrapbook Layout:
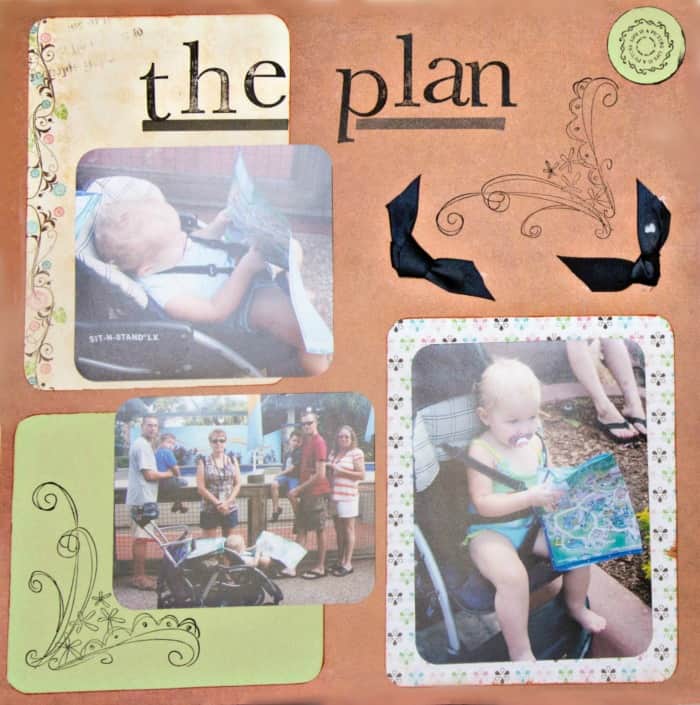
On this trip, it was amusing how the youngest member of our family kept trying to read the map of Sea World. That was the inspiration for this page. The mats for this page can be made using stamps, rubber, or clear stamps both work well; or a paper crimper tool. Oversized cutouts can give your layout added dimension and keep your designs fresh. Add a little piece of tied ribbon to accent the page.
Wake Up Daddy Sea World Scrapbook Layout:

A half circle trimmed with decorative edge scissors and stamped with a coordinating color ink is how you can add your personalized journal box to this page. After writing the journal entry on it, attach it to your page. Next, pick a stamp and ink in a color that accents your base page and stamp some design on it, overlapping your journal box to tie the box into your overall design. A few well-chosen words stamped onto your cardstock mat will add that special touch to that picture. The title can be cut out using the Cricut Alphalicious font cartridge.
Carousel Sea World Scrapbook Layout:
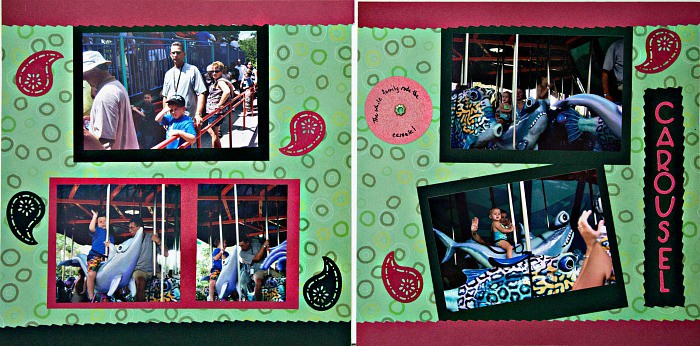
The patterned paper will make your layout quick and easy to complete. One of the mats in this design is a single mat with two photographs on it for added variety. Cut the borders and the title box with decorative edge scissors and to duplicate this title, use the Cricut Cuttin' Up font cartridge. You can add an eyelet, like the one pictured, to hold an embellishment to your page by using an eyelet setting tool. One end of this tool punches the hole, and the other side sets the eyelets.
Beat the Heat Sea World Scrapbook Layout:

Attach suns that are border cut from the Cricut Doodlecharms image cartridge to the boundary cut with the 12-inch trimmer. A couple of triangles stamped and attached to opposite corners will give you a different look for this layout. Cutting your images and mats into shapes also gives this page a whimsical, fun feeling.
Family Fun Sea World Scrapbook Layout:

You can tell a story with a couple of pictures and pieces of cardstock or paper with a few words on each one. Another idea would be to use a label maker with a few words on each piece. For some added elements add a chipboard arrow, along with some other shapes, and chipboard letters spelling out your title. You can stamp any image on white cardstock or paper and color it with colored pencils to design your custom embellishment. Attach it to the page with a dual-adhesive foam mount to add dimension to your page. Once again, you can compose an original picture mat by stamping on solid color cardstock.
The Shows Sea World Scrapbook Layout:
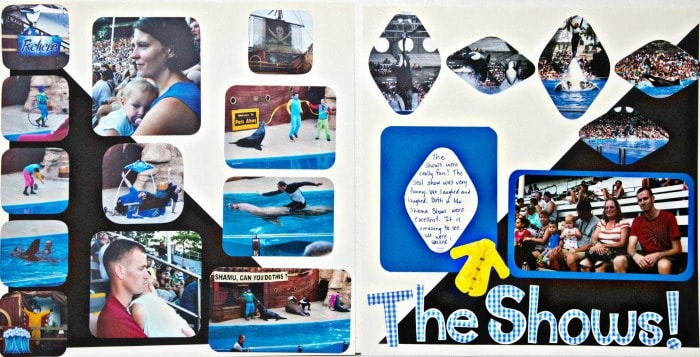
These types of pages can be a lot of fun to create when you duplicate the colors of the event or shows you attended. To get a creative layered title effect, use printed paper to cut out your title using the Cricut Cuttin' Up cartridge. Then repeat the die cuts with a solid color cardstock, using the shadow feature. Experiment with different shape templates over your pictures to find out what you like the best and then cut them out. You can create rounded corners on your photographs and mats using a rounder, corner punch. Rounding the corners is a quick way to give your pictures and mats a consistent look.
Goodnight Sea World Layout
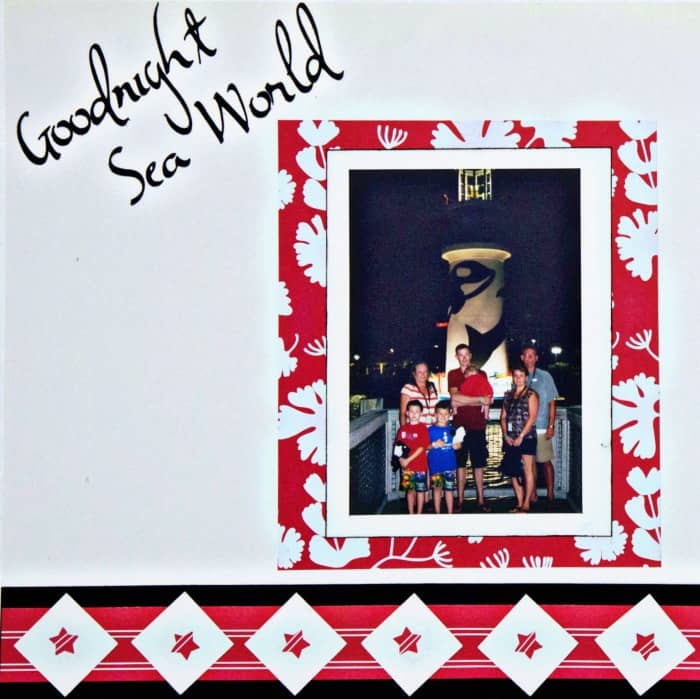
Starting with a solid background and adding a triple-layer border, along with a printed paper mat behind one key photograph will make your page pop! Cut two borders with your 12-inch paper trimmer for the first two layers. Then punch out squares or circles with another shape punched out of the middle of each one for your top layer. Double matting the picture and distressing the top layer of cardstock makes the photograph the center of this layout. To duplicate the title use the Cricut Jasmine font cartridge.
Well, I am going to close now, I know you are thinking, thank goodness for that. As always, I hope you found this article helpful. But, I want to leave you with this....
Coming Soon
Good Morning Disney!

Until then, thank you for reading. Please leave comments sharing your favorite Sea World scrapbook layouts. I would love to hear from you!
Check out all of our Scrapbooking Posts:
Christmas Scrapbook Pages Ideas
DIY Graduation Scrapbook Layout
Drivers License Scrapbook Layout


Comments
No Comments