I wanted to share this How To Repair A Paver Patio tutorial with you. It's starting to cool off again, so it's time to start thinking about outdoor improvements, and the patio seemed like a great place to start.
How To Repair A Paver Patio:
It has been over ten years since we laid pavers for our patio and walks. The picture below shows some of the cracks we are getting, so it is apparent that it is time for a makeover.

How To Repair A Paver Patio Supplies:
Pry bar or sturdy Flat Screwdriver
Garden Hose
SAE Tape Measure
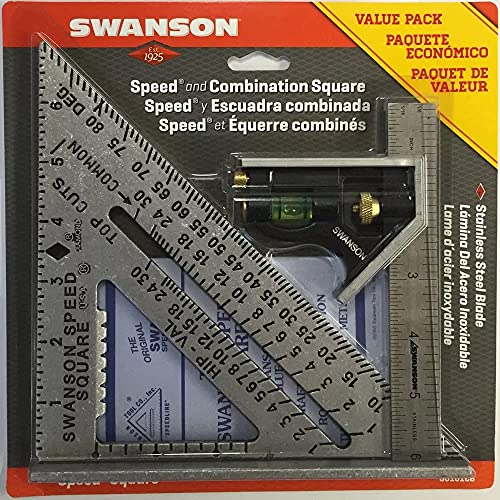
Standard Speed Square
Wire Brush
Compound Miter Saw
Reciprocating Saw
48-inch Standard Level
Carpenter Saw
Cordless Screwdriver
Rubber Mallet
Brick and Block Trowel
4X4 Severe Weather Pressure Treated Lumber
2X4 Severe Weather Pressure Treated Lumber
1X6 Severe Weather Pressure Treated Pine Deck Board
3-inch Countersinking-Head Polymer-Coated Deck Screws
1.625-inch Countersinking-Head Polymer-Coated Deck Screws
Leveling Sand
How To Repair A Paver Patio: Framing

Before you start this project, check the weather forecast. To allow the prep work time to settle, you will most likely need a few days with no rain to complete this project. Unfortunately for us, Hurricane Hermine decided to make an appearance before we had finished our patio, which is why I included a weather warning.
Step 1: If you are enlarging your patio, pull up the entire patio instead of just repairing the weak spots. Start by removing the pavers out of the patio, and set them aside.

If you have a pry bar, you will find it helps tremendously with paver removal. If you don't happen to have a pry bar laying around, a sturdy flat screwdriver will get them loose enough to pick them up.
Move them far enough away that you will have plenty of room to work, but you can get close enough to get them back in place quickly.

As you can see, the pavers will not come up clean, so use a garden hose to spray them clean so that they will be ready to use once you finish your patio foundation work. It won't hurt to have a wire brush handy for any stubborn ones.

Step 2: Remove the old patio framework. Try a reciprocating saw to cut the screws so that you can get the old frame apart easily. The reciprocating saw will cut through 3" screws with no trouble. After cutting the screws, remove each side of the frame one by one.

Step 3: Take some measurements to see how big your new patio will be. Measure the space available for your new patio. Then lay out the pavers to see what the inner frame length and width measurements need to be to maximize your open patio space.

Add seven inches to the pavers' length and width to get the outer dimensions of your patio frame. We recommend you add ¼-inch to the final length and width measurements. Adding this small amount of space will help allow for variance in the paver's size and how tight they fit into the frame. Hopefully, a little extra room will eliminate the need to cut a row of pavers down to fit into the framework.
Step 4: Mark the outer and inner measurements on your 4X4 and then draw the line between them with a speed square. Visually seeing the line is helpful regarding what your 45-degree cut will look like before you cut.

Drawing the line on the 4X4 allows you to double-check your measurements one more time before cutting to ensure you will end up with the correct size frame.
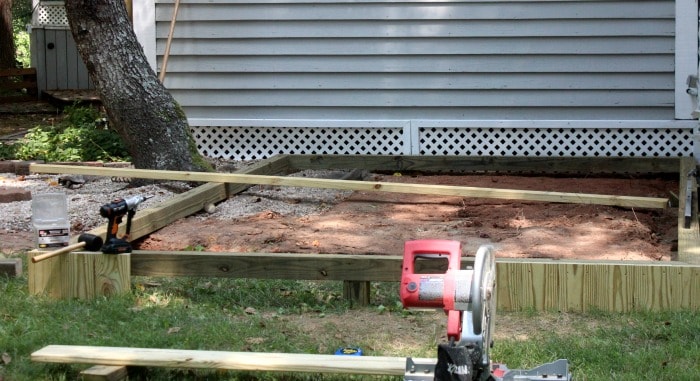
You've heard the old saying, "measure twice, cut once." So check and re-check your dimensions, and then start cutting out the frame for your new patio using 4" X 4" lumber.
A 10" compound miter saw will get this job done with only small issues with the 45-degree cuts. A 12" saw will work better, but you can make a 10" saw work.
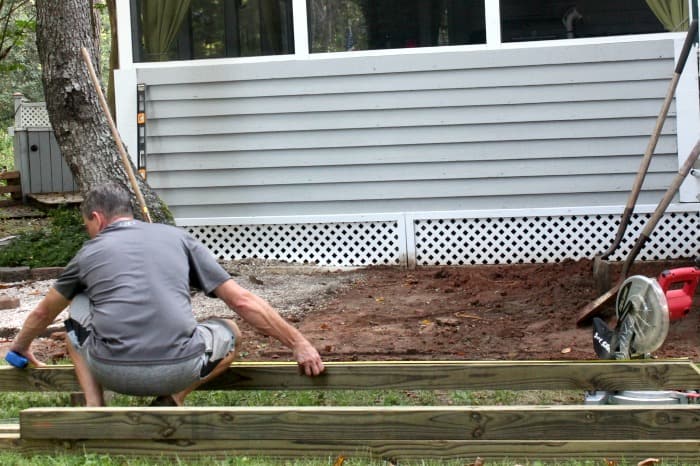
Step 5: Find a good flat space to lay out your frame as you cut each piece. Measure the inner dimensions once again before you start assembling the framework.

Step 6: When your finished dimensions are correct, assemble using 3-inch countersinking-head polymer-coated deck screws.
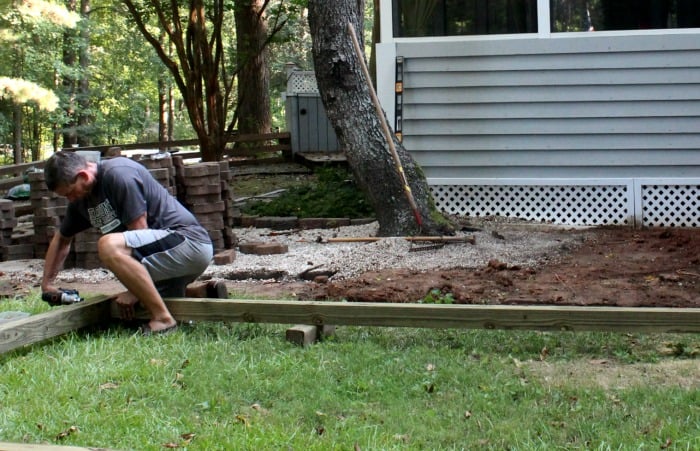
Step 7: Move the frame to the new patio location to start the leveling work.
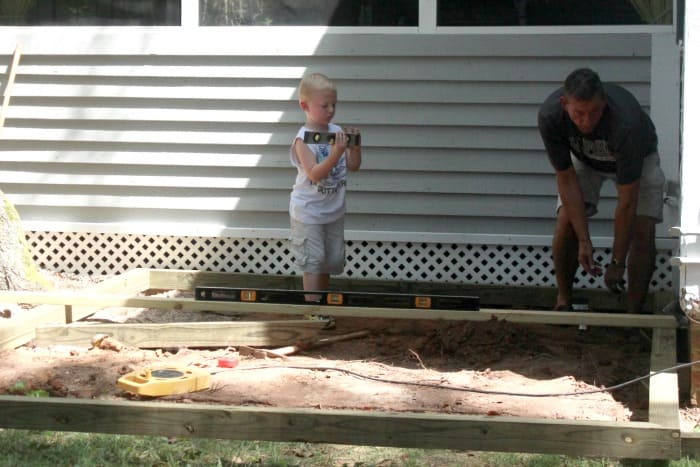
It was a pleasure to watch our grandson helping his Papa with this project. Each time Papa would get a level and use it, CJ would get his level too.
Laying a 2X4 across the frame will help with the leveling from side to side. You can raise the sides with wood wedges, or lower the sides with dirt removal.
How To Repair A Paver Patio: Filling the frame
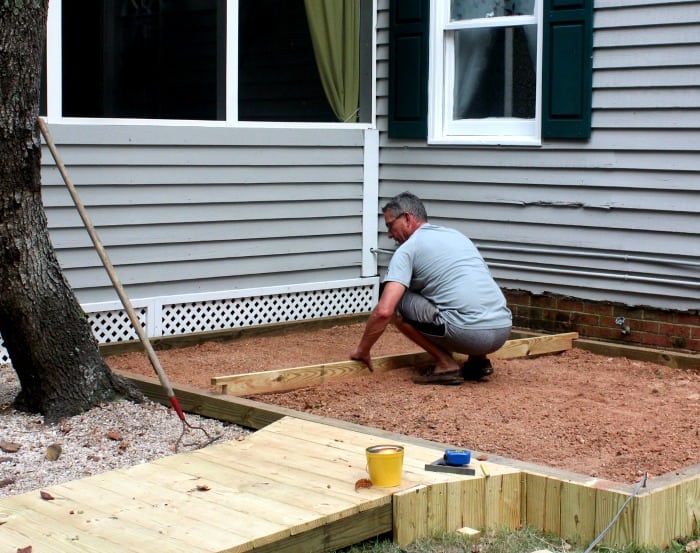
Step 8: With the frame level, close the walls to keep the dirt inside your frame. You can get your frame level using additional 4X4's to fill the gaps or lengths of severe weather pressure-treated pine deck board cut to the height you need.
Step 9: Cut each facial board slightly longer than you need. Then use a rubber mallet to tap the board down into the ground until it is at the same height as the top of your 4X4.
Putting up the wall around your frame will keep the dirt used for the foundation for the pavers from washing out of your frame when it rains. Attach the cut wood pieces to the 4X4 using 1.625-inch countersinking-head polymer-coated deck screws.

As you can see, our grandson was able to get in on the rubber mallet action as well.
When replacing an existing patio, the foundation will already be partially ready to go. If you are building this patio in a new location, start with landscape fabric before putting any dirt in your frame.
The landscape fabric prevents weeds and grass from growing up through your pavers later.
Clay makes a fantastic foundation for pavers. We have black dirt and sand under some walks, and clay and sand under others. The patios with clay and sand foundations have held up better than the others.
Put enough dirt or clay into your frame to raise the pavers almost to the top of the framework you built.
Step 10: Once you have added enough dirt to the frame, start to spread and pack the dirt down. A 2X4 with notches cut in each end to drag the dirt to exactly the right height for the pavers will work nicely for this. Make the cuts in the 2X4 with a hand saw. Once you drag the dirt to be mostly level, use a hand tamper to help pack the dirt tighter.

Keep adding clay/dirt and pulling the leveling board across to smooth the surface. Then tamp your surface until it is has a firm, smooth and stable feeling, and will be slightly lower than your pavers.
Using a rake when spreading the dirt will help keep the soil soft and help remove rocks and debris from the earth at the same time.
Using your hose, wet the surface with a soft, gentle mist to help pack the dirt to a firm finish. Once it starts to puddle in the center, allow it to sit until the water has been completely soaked in.
Overnight will work for this, but sitting in the sun helps to dry and pack the dirt, too. Repeat this process until you have a workable surface for your pavers.

Step 11: You will need paver sand to finish your paver foundation. Putting sand over the dirt/clay will give you an excellent foundation on which to lay your pavers.

Once you have your sand to the level you like, wet the surface with a soft, gentle mist to help pack the sand to a firm finish.
Once it starts to puddle in the center, allow it to sit until the water has been completely soaked in. Overnight will work for this, but sitting in the sun helps to dry and pack the sand, too.
Repeat this process until you are satisfied with your working surface.

Step 12: Use a brick and block trowel to pull the excess sand up from the edges.

Step 13: Place your pavers into the frame.

Keep adding rows of pavers until your frame is full.
Step 14: Once you have filled your patio frame, pour some leveling sand on the pavers and sweep it in to keep your patio tightly in place. If you want extra binding between the pavers' joints, use sand that has polymer dust added. This type of sand will bind the joints between the pavers when it mixes with water.

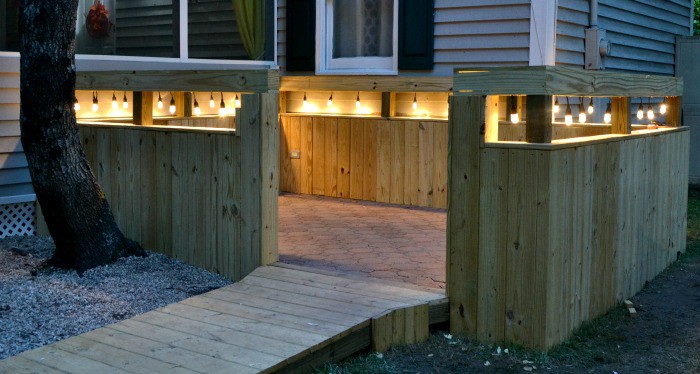
The next step in our patio process will be to build the wooden walk and the walls. See you then!
📖 Recipe
How To Repair A Paver Patio
Easily update your existing paver patio with these simple maintenance steps.
Materials
- 4X4 Severe Weather Pressure Treated Lumber
- 2X4 Severe Weather Pressure Treated Lumber
- 1X6 Severe Weather Pressure Treated Pine Deck Board
- 3-inch Countersinking-Head Polymer-Coated Deck Screws
- 1.625-inch Countersinking-Head Polymer-Coated Deck Screws
- Leveling Sand
Tools
- Pry bar or sturdy Flat Screwdriver
- Garden Hose
- SAE Tape Measure
- Standard Speed Square
- Wire Brush
- Reciprocating Saw
- Compound Miter Saw
- Carpenter Saw
- Cordless Screwdriver
- 48-inch Standard Level
- Rubber Mallet
- Brick and Block Trowel
Instructions
- If you are enlarging your patio, pull up the entire patio instead of repairing the weak spots. Start by removing the pavers from the patio and setting them aside.
- If you have a pry bar, you will find it helps tremendously with paver removal. If you don't have a pry bar, a sturdy flat screwdriver will get them loose enough to pick them up.
- Move them far enough away that you will have plenty of room to work, but you can get close enough to get them back in place quickly.
- Remove the old patio framework. Try a reciprocating saw to cut the screws to get the old frame apart quickly. The reciprocating saw will cut through 3" screws with no trouble. After cutting the screws, remove each side of the frame.
- Take some measurements to see how big your new patio will be. Measure the space available for your new patio. Then lay out the pavers to see the inner frame length and width measurements needed to maximize your open patio space.
- Add seven inches to the pavers' length and width to get the outer dimensions of your patio frame. We recommend you add ¼-inch to the final length and width measurements. Adding this small amount of space will help allow for variance in the paver's size and how tight they fit into the frame. Hopefully, the extra room will eliminate the need to cut a row of pavers down to fit into the framework.
- Mark the outer and inner measurements on your 4X4 and then draw the line between them with a speed square. Visually seeing the line is helpful regarding what your 45-degree cut will look like before you cut.
- Drawing the line on the 4X4 allows you to double-check your measurements one more time before cutting to ensure you will end up with the correct size frame. You've heard the old saying, "measure twice, cut once." So check and re-check your dimensions, and start cutting out the frame for your new patio using 4" X 4" Severe Weather Pressure Treated lumber. A 10" compound miter saw will get this job done with only minor issues with the 45-degree cuts. A 12" saw will work better, but you can make a 10" saw work.
- Find a good flat space to lay out your frame as you cut each piece. Measure the inner dimensions once again before you start assembling the framework.
- When your finished dimensions are correct, assemble using 3-inch countersinking-head polymer-coated deck screws.
- Move the frame to the new patio location to start the leveling work.
- Laying a 2X4 across the frame will help level from side to side. You can raise the sides with wood wedges or remove the sides with dirt.
- With the frame level, close the walls to keep the dirt inside your frame. You can get your frame level using additional 4X4s to fill the gaps or lengths of severe weather pressure-treated pine deck board cut to the height you need.
- Cut each facial board slightly longer than you need. Use a rubber mallet to tap the board down into the ground until it is at the same height as the top of your 4X4.
- Putting the wall around your frame will keep the dirt used for the pavers' foundation from washing out of your frame when it rains. Attach the cut wood pieces to the 4X4 using 1.625-inch countersinking-head polymer-coated deck screws.
- The foundation will already be partially ready to go when replacing an existing patio. Building this patio in a new location starts with landscape fabric before putting any dirt in your frame.
- The landscape fabric prevents weeds and grass from growing through your pavers later.
- Clay makes a fantastic foundation for pavers. We have black dirt and sand under some walks and clay and sand under others. The patios with clay and sand foundations have held up better than the others.
- Put enough dirt or clay into your frame to raise the pavers almost to the top of the framework you built.
- Once you have added enough dirt to the frame, spread and pack the soil down, a 2X4 with notches cut in each end to drag the dirt to precisely the right height for the pavers will work nicely for this. Make the cuts in the 2X4 with a hand saw. Once you drag the dirt to be mostly level, use a hand tamper to help pack the dirt tighter.
- Keep adding clay/dirt and pulling the leveling board across to smooth the surface. Then tamp your surface until it has a firm, smooth, stable feeling and is slightly lower than your pavers.
- Using a rake when spreading the dirt will help keep the soil soft and help simultaneously remove rocks and debris from the earth.
- Using your hose, wet the surface with a soft, gentle mist to help pack the dirt to a firm finish. Once it starts to puddle in the center, allow it to sit until the water has been thoroughly soaked in.
- Overnight will work for this, but sitting in the sun helps dry and pack the dirt. Repeat this process until you have a workable surface for your pavers.
- You will need paver sand to finish your paver foundation. Putting sand over the dirt/clay will give you an excellent foundation for laying your pavers.
- Once you have your sand to the level you like, wet the surface with a soft, gentle mist to help pack the sand to a firm finish.
- Once it starts to puddle in the center, allow it to sit until the water has been thoroughly soaked in. Overnight will work for this, but sitting in the sun helps to dry and pack the sand, too.
- Repeat this process until you are satisfied with your working surface.
- Use a brick and block trowel to pull the excess sand from the edges.
- Place your pavers into the frame.
- Once you have filled your patio frame, pour some leveling sand on the pavers and sweep it in to keep your patio tightly in place. If you want extra binding between the pavers' joints, use sand with added polymer dust, and this sand will bind the joints between the pavers when mixed with water.
- The next step in our patio process will be to build the wooden walk and the walls. You can find that post here on the blog.
Recommended Products
As an Amazon Associate and member of other affiliate programs, I earn from qualifying purchases.


I hope you enjoyed this tutorial and learned how to quickly and easily repair your paver patio.


Comments
No Comments