Missing a button? Here is an easy step by step showing How To Sew On A Two Hole Button that should help you out.
How To Sew On A Two Hole Button:

Two-Hole Flat Button
Replacing a missing button is not hard. Following these simple steps will get you through this process quickly and easily.

How To Sew On A Two Hole Button Supplies:
Button
Needle
Thread
Toothpick
Scissors
Pencil
Needle Threader (Optional)
How To Sew On A Two Hole Button: Preparation

Step 1: Clean threads away from where the old button was sewn. A small scissors should work if you clip the threads close to the fabric and then pull them back through the cloth.

If you are unable to remove all of the threads with small scissors, a seam ripper will slide under any stubborn threads and slice right through them for easier removal.

Step 2: Once you have all of the old threads removed, line up the spot where the button will go with the matching button hole. Inside the button hole, mark where the button needs to be with a pencil.

Step 3: Double thread your needle with the color thread that will match the garment and the button, and tie a knot in the threads.
How To Sew On A Two Hole Button: Needlework
Step 4: Once you have marked where you want your button placed, you can begin sewing. Start inside the garment and pierce the fabric towards the outside with your needle. Pull the thread through the cloth until you reach the knot. If you have trouble with the knot being too small and coming through the fabric, pull the thread through until the knot almost reaches the cloth and make one stitch in the material to anchor your thread before starting to sew on your button.
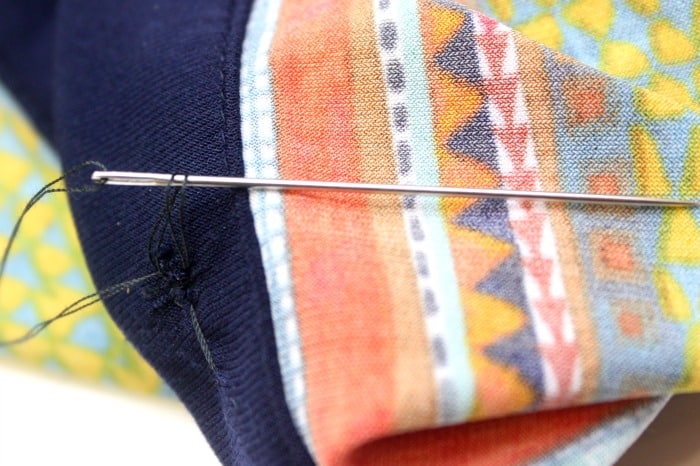
Step 5: Now that your needle is piercing the cloth, lay a toothpick across the fabric under the new button to raise the button up from the fabric. Then thread the needle through one of the holes in the button beside the toothpick you placed under the button.
Step 6: Next, run your needle back through the other hole in the button, on the other side of the toothpick, and the cloth underneath the button. Pull the slack out of the thread. The button should be held in place firmly, but not so tight that you may break the thread. Repeat steps five and six about four more times so that your button is nice and secure.

Step 7: Pull the toothpick out from behind your button. Wrap your thread around the stitches you made under the button in a clockwise motion about three or four times. Wrapping the thread around the stitches creates a type of button stem that allows the button to be raised up from the cloth.
Step 8: After wrapping the thread around your stitches to form the stem, thread the needle back through the cloth to get behind the button. Run the needle under the stitches that keep your button on the fabric and pull the thread until all that remains is a tiny loop.

Step 9: Thread your needle through the small loop and pull until the thread makes a knot behind your stitches. You can repeat step nine one more time if you feel like you should, but it is not required to keep the button on.

Step 10: Clip the threads short just past the knot you just made.
Now you are all ready to wear the clothing that you just replaced the button on. Great job! You should feel proud of yourself; you learned something new today.
You can also learn how to sew on a button here.


Comments
No Comments